January 28, 2015

PTU "Cherry Berry Crush" Tutorial


This Tutorial was written by me, any resemblance to another tutorial is completely unintentional. 
I am using Photoshop CS5 for this tutorial.
Tube
"Susan" by Stan Dudin
Scrap Kit
"Cherry Berry Crush" by Gimptastic Scraps
Font
Pea Becki Font
Mask
WSL_260 (download the bulk file on the right of her blog)
Filters
VanDerLee>Unplugged-X
LenK's>Zitah

Let's get started. 
Open your canvas at 650x650
Drag in Frame5 and your tube, resize to your liking. 
Now bring in the close up, and duplicate. Position, and then merge them. 
Go to your frame layer and click inside of it with your magic wand tool. 
Select>Modify>Expand...5.
Inverse, and then go to your close up layer and hit delete with your keyboard.
Then Select>Inverse again.
Create a gradient under that layer with the colors #aa0000 & #d951b8
Duplicate your close up layer and then on the duplicate, Filter>Blur>Gaussian Blur....5.5
Now Select>Deselect.
On the duplicated layer you will want the Blending Mode- Screen
On the original close up layer you will want Blending Mode- Luminosity with the opacity at 75%.
Now for the elements...

I used all of the following:
Balloons
Berries
Button
Cupcake
Envelope Scatter
Flower 2
Flower 3
Flower Scatter
Gift Bag
Label 2
Leaf 1
Leaf Doodle
Paper Flower
Pearls
Petals
Ribbon Flower
Scatter
WA

Position to your like and then add a drop shadow like so to all elements but the WA, including your
frame like so:


Now for the mask... I used Paper6 along with the mask I linked above. :)
Add your copyright info and now for the name.

I used the font Pea Becki with the color #c50000 at 48 px.
I also used stroke in white at 2 px with opacity at 100%
Now for the Bevel and Emboss. I used it like so:


Now add your drop shadow like you did with the elements to the name and you're finished!
Thanks for checking out my tutorial!


January 26, 2015

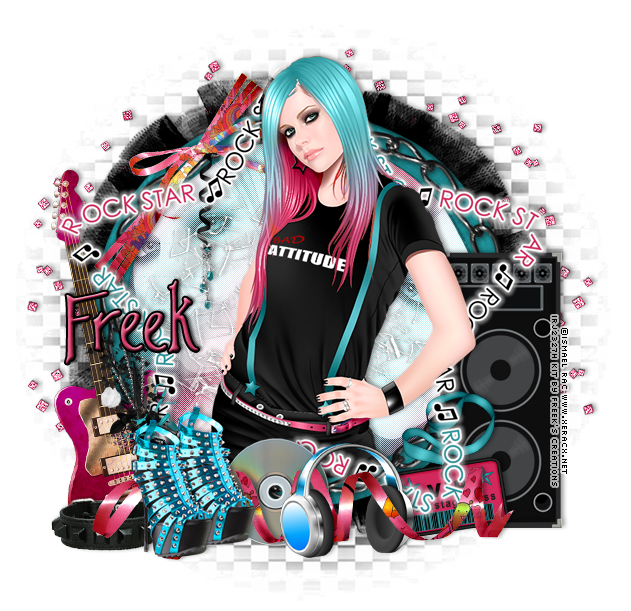
PTU "Rock Star" Tutorial

This Tutorial was written by me, any resemblance to another tutorial is completely unintentional. 
I am using Photoshop CS5 for this tutorial.
Scrap Kit
"Rockstar" by Freek's Creations
Tube
I used the artwork of Ismael Rac. You must have a proper
 license to use his artwork. 
Font
DJB I Love a Ginger
Mask
WSL_98 (download the bulk file on the right of her blog)
Filters
VanDerLee>Unplugged-X
LenK's>Zitah

Let's get started! 
Open up a new canvas at 650x650. 
Drag your tube into the canvas. 
Bring in Frame and Word Art from the kit and position all under the tube layer. 
Click inside of the Frame and Select>Inverse. 
Use your eraser tool to erase all of the tube on the outside of the marching ants on the bottom. 
Now position the Word Art above the tube layer. 
Go back to your tube layer and use your magic wand to click outside of the tube. 
Select>Inverse.
Now go back to the word art once again and erase all that is over the tube's face and arm. 
Now drag in your close up and position below all layers. 
Position to your liking and then duplicate it. 
Edit>Transform>Flip Horizontally 
Position to your liking and then merge the two layers. 
Now go back to your frame and click inside of it again. 
Select>Modify>Expand....4
Select>Inverse.
Go down to the merged close up layer and hit delete with your keyboard. 
Now hit Select>Inverse once again and create a new layer under the merged tube layer. 
Create a gradient from your tube's clothing like so:

I used the colors #54bcc3 & #d83867
Fill the inside of your marching ants with this gradient and then go to your merged tube layer. Duplicate it. 
Filters>Blur>Gaussian Blur>6.3
on the duplicated layer.
Monochrome the duplicated layer to black and white and then use Blending Mode- Screen
On the original layer use Blending Mode- Luminosity 
Now use your filter VanDerLee>Unplugged-X> Pattern Offset...32
and then LenK's Zitah with the settings like so: 
Select>Deselect
Now for the elements. 
I used the following: 
Backstage Pass
Bling (Duplicated 3 times)
Bow
Broken Glass
CD
Charm3
Flowers
Guitar
Headphones
Ribbon4 ( I removed the part of the ribbon that was over one side of the headphones)
Shoes
Speakers
add your drop shadow to all layers like so: 
Now do your mask that I suggested above on Paper1 and duplicated it, and then put all of your correct copyright info on it and then crop it to your liking.
Now for the name- 
I used the font DJB I Love a Ginger with the color #d63d6a at size 60 px. 
Then I the stroke around it in black, size 2 px, 100% opacity. 
Then I used Bevel and Emboss like so:
Add a drop shadow like I did with the other layers and then you're done! 
I hope you enjoyed my tutorial and TY for stopping by! 


CT Pink Paradox Productions: "Steampunk Girl" Tags + Snags

More tags and snags today made with a fabulous steampunk kit by Pink Paradox Productions called "Steampunk Girl". Be sure to drop on over to her store and buy it on sale today! 


Here are the tags I made with this awesome kit: 


And now for some snags:


Thanks for stopping by! Feel free to leave me some love! 
post signature

CT Foxy Designz: "Magical Night" Tags + Snags

Got some tags and snags for ya made with a beautiful and dark kit called "Magical Night" by Foxy Designz, you can find it in her store HERE


Here's what I created:


And here are some snags! 


Thanks for stopping by my blog! 
post signature

January 24, 2015

CT MellieBeans: "Definitely Girly" Tag Show Offs

Got some tags today made with the fabulously pink and girly kit by MellieBeans called "Definitely Girly, Definitely". It is available at PicsForDesign. Here is what I made with this kit: 


Thanks for stopping by!

post signature

January 20, 2015

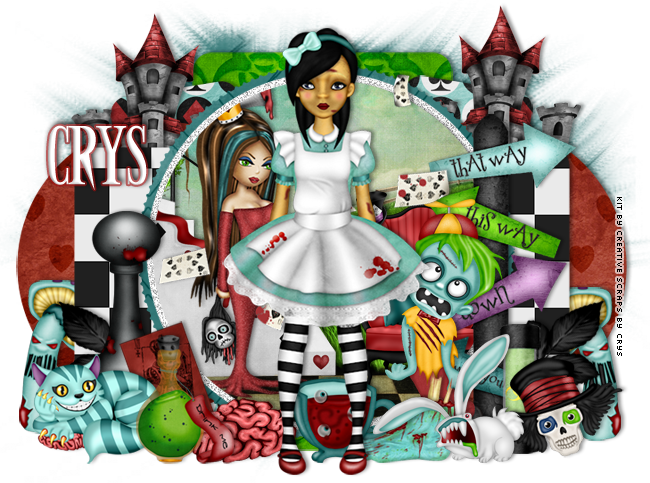
PTU "Alice in Zombieland" Tutorial

This Tutorial was written by me, any resemblance to another tutorial is completely unintentional. 
I am using Photoshop CS5 for this tutorial.
Tube
Tube used was one of the elements found in the scrap kit.
Scrap Kit
Alice in Zombieland by Creative Scraps by Crys
Font
Army of Darkness
Template
Template 727mpm
Mask
WSL241, you can download it in bulk on the side of her blog HERE.
K let's get started.
First open up your template  and resize it with the largest side at 650 px. and then start with the papers. Here's what I used for each layer of the template:
Layer 9- AIZPaper_14
Layer7- AIZPaper_8
Layer 6- AIZPaper_10
Layers 5 & 4- AIZPaper_16
I merged Layers 3 & 2- AIZPaper_4
And for Layer 1- AIZPaper_17
With each paper, I simply positioned it above the layer I was using, and held down ALT as I clicked between the paper and layer. 
Now for the elements-
For the inside of Layer 9 I used AIZ Element_22, AIZElement_33, and AIZElement_52. Then I used the same method for the papers to crop them inside of the circle. 
As for the rest of the elements, here's what I used:
AIZElement_1
AIZElement_4
AIZElement_8
AIZElement_20
AIZElement_29
AIZElement_30
AIZElement_35
AIZElement_36
AIZElement_49
AIZElement_54
AIZElement_56
AIZElement_59
AIZElement_61
AIZElement_63, duplicated
AIZElement_64
AIZElement_69, duplicated
AIZElement_70, duplicated
I added a drop shadow to all elements and layers like so: 
Now for the mask, I used the AIZPaper_8 with the mask I stated above and made it into an 
oval shape, and then positioned it behind everything else.

For the name I used the font ArmyofDarkness, with the color white at 85 px.
Then I used the Layer Style Stroke with the color #980d0d, and then added a drop shadow like the one I used for the elements.
Now add your credits and there you are! 
Thanks for checking out my tutorial! 
post signature

PTU Tut: "Shabby Perfection"


This Tutorial was written by me, any resemblance to another tutorial is completely unintentional. 
I am using Photoshop CS5 for this tutorial.
Tube
I'm using the artwork of Anna Liwanag. this tube
 can be found at Creative Design Outlet
You must have a valid license to use their artwork.
Scrap Kit
"Shabby Perfection" by MellieBeans. You can purchase this
kit at Spazz'd Art.
Font
Southern Aire
Mask
MPM_Mask52 found HERE.
Filters
xero>Soft Vignette


Let's get started.
First open up a new canvas with the sizes 650x650. 
Now open your frame - e66, drag into your canvas and resize to your liking. 
Now open up your tube and drag the medium sized layer into your canvas above the frame. 
Use your magic wand to click the inside of the frame, and go to Select>Inverse. 
Use your eraser tool to erase the excess part of the tube over the frame on the bottom. 
Now open your close up and drag it into your canvas, and bring under the frame layer. 
Position to your liking and then duplicate it. 
Now on the duplicated layer, Edit>Transform>Flip Horizontally
Position accordingly, and then merge down to combine the tube layers. 
Now, go back up to your frame layer and click inside with your magic wand again.
Select>Modify>Expand...4.
Select>Inverse, and then go down to your close up merged layer and click delete on your keyboard. 
Now, Select>Inverse again and duplicate the merged layer.
Go down below the first duplicated layer and created a new blank layer. 
Create a gradient to your liking, I chose one like this: 


with the colors #e9dbd9 and #879d95, and bringing it down in a diagonal way. 
Now go back up to your close up merged copy and go to Filters>Blur> Gaussian Blur....6. 
Blending mode-Screen for that one, and then Filter>xero>Soft Vignette> with these settings:


 and then Softlight blending mode for the bottom layer. 
Select>Deselect. 

Now to add the elements,
Here are the elements I used:
e04
e07
e11
e14
e22
e23
e25
e32
e37
e38
e40
e42
e46
e47
e48
e50
e52
e57
e59
e60
e70

I used the drop shadow like so for all of the element layers and the frame and tube as well.

Now do your mask with the paper pp08 and your copyright as normal. 

Now for the name. 
I used the font Southern Aire, with the color #719289 at 72 px.
For the layer styles I used stroke, at 2 px, outside, normal, 100% opacity with white as my color. 
Next I used bevel and emboss like so: 


and then drop shadow like so; 


And that's it! I hope you enjoyed my tutorial! 
post signature

January 19, 2015

CT Foxy Designz: "Winter Shimmer" Tag + Snags

Got a tag today made with a gorgeous mini kit by Foxy Designz called "Winter Shimmer". It's an exclusive kit at Creative Design Outlet.
Here's what I created with it:

And here are some snags:


Thanks for stopping by!

post signature

January 18, 2015

CT Gimptastic Scraps: "Scandalous Seduction" Tags + Snags

Gimptastic Scraps recently released a dark and love-gone-wrong type kit called "Scandalous Seduction", and I had a chance to work with it today. You can pick it up at The PSP Project


Here's what I made with it: 


And here are some snags:


Thanks for stopping by! 
post signature