This Tutorial was written by me, any resemblance to another tutorial is completely unintentional.
I am using Photoshop CS5 for this tutorial.
Tube
Sexy Patty by Elias Chatzoudis
Scrap Kit
Shake Your Shamrocks by Creative Scraps by Crys
Font
FTU font- Kells
Template
Template 506 by Millie's PSP Madness
Mask
MPM_Mask22
Lets get started!
Open up your template and resize the largest side to 650.
Bring in your close up and bring down above the Layer 3.
Duplicate and position that above Layer 4.
Hold down ALT as you click between the layer and the close up. Do the same for the
original and Layer 3, so that they are cropped inside the circles.
Duplicate the close up again, and drag so it is positioned above the Layer 5.
Position to your liking, duplicate, flip horizontally, and then position to where there are no empty spaces inside the layer.
Merge with the first layer and then hit ALT on your keyboard as you click between the template
layer and the merged close up.
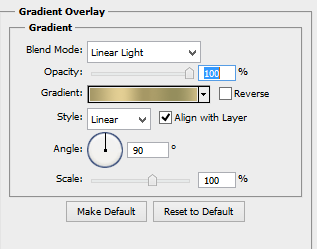
Now you will want to create a gradient, I made my first one like so:
With the colors #b4ce2b and #86639d.
Select the inside of your Layer 5 of the template with your magic wand
and put your gradient across it.
Now duplicate the merged close up layer.
Filter >Blur > Gaussian Blur...6.
Make that layer black and white and then make it have Screen for the blending mode.
For the bottom layer, Luminosity blending mode.
Now go back down to your Layer 3 of the template and create another gradient
the same way as before but using the colors #f6ea5a and #445f0e.
magic wand and follow the steps as before, but don't make the duplicated layer
black and white.
Duplicated layer- Screen blending mode
Main layer- Soft Light and lower opacity to 65%.
Do the same to Layer 4.
Now add your tube layer to your liking.
Time to add the elements:
SYS_Element_5
SYS_Element_8
SYS_Element_9
SYS_Element_11
SYS_Element_26
SYS_Element_30
SYS_Element_31
SYS_Element_32
SYS_Element_33
SYS_Element_38
Add your drop shadows to all layers but your tube like so:
Use this drop shadow for your tube:
Now add your copyrights and then it's time to add the mask.
I used the mask I stated above with the SYS_Paper_3.
Then I smooshed (yes that's a word LOL) it down to fit the canvas... and then duplicated it.
Now time to add the font!
I used the font Kells at 60 px. with the color #b6d02f.
Then I made a stroke around it with black at 65% opacity.
I did a Bevel and Emboss like so:
And then the drop shadow as I did on the other elements.
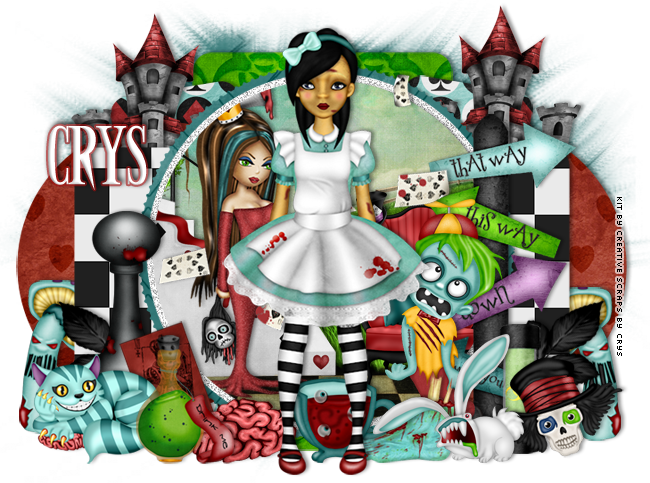
That's it!
Thank you for stopping by to check out my tutorial and I would love to see your results!