December 25, 2011

Cap'n Jack Sparrow PTU Tutorial


This tutorial was written by me, any resemblance to any other tutorial is completely unintentional. PSP version used: PSP X2


Supplies:
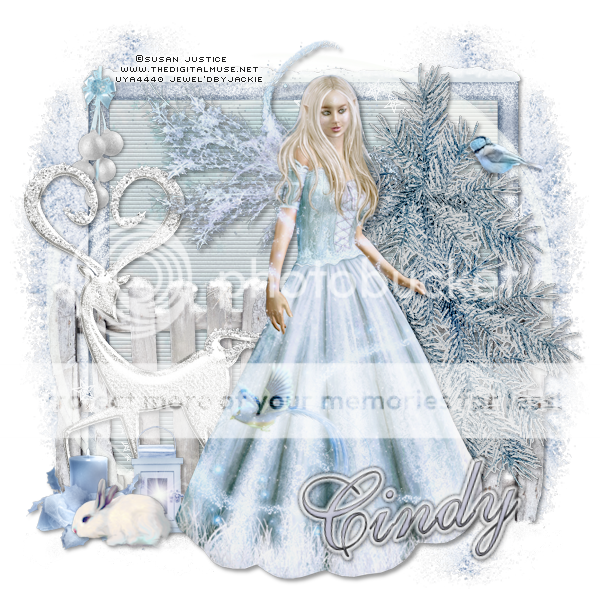
Tube- I'm using an awesome exclusive tube from Pics For Design, this tube can be purchases with an exclusive membership at Pics For Design
Scrap Kit of choice- I used the kit Treasured by ChiChi, you can find out more about it on her blog ChiChi Designz
Font- Black Beard
Filters-
Eye Candy 4000> Gradient Glow


Ok lets get started! 
Open a new canvas 600x 600. 
Open Frame4, resize 70% 
Open Paper1,  resize 50% 
magic wand, and hold down the shift button, to magic wand all 3 insides of the frame. 
Selections> Modify> Expand 14 px. 
Invert, an go back to paper layer. Delete. 

Now open your tube, and resize 40%
c & p, and position as you would like. 

Now for the elements: 
Barrel- 40%
Barrels- 40%
Beware Sign- 30% 
Candles- 30% 
Chest- 30%
Coins- 20%, duplicate and resize duplicate layer 60% 
Crate- 40% 
Flag2- 50%
Gold- 20%
Lantern- 30%, erase bottom of lantern so it looks flat. 
Treasure Chest- 40% 
Firework- 50%, duplicate, 
Image> Mirror 

Now position Mask behind all layers, and resize width only- 90% 
Now add your drop shadow to all layers except the mask and fireworks. 

Now for the font! 

I used BlackBeard with black as the BG color and #aa854a as the FG. 
Size 74 px., stroke width 2.0
Convert to raster layer. 
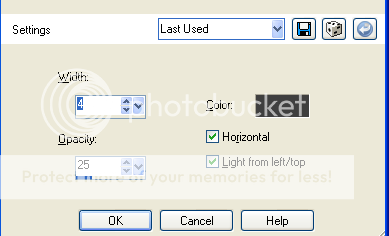
Eye Candy 4000> Gradient Glow with these settings:


Medium color setting. 
Use same settings to do Gradient Glow again, with Black Halo setting. 

Drop shadow to the name, and add your copyright info! 

POW! BANG! WOOOSH! 

You're done! ;) 
Thanks for checking out my tutorial and please drop me a comment and follow my blog if you like what you see!


Photobucket

December 22, 2011

Sin City PTU Kit

I've got a new scrap kit for sale at Fabulous Art Beginnings! It has 55 elements and 11 papers, and it's Inspired by the hidden aspects of Las Vegas and the familiar saying, "What happens in Vegas, stays in Vegas!" Lot's of fun and different elements and papers to play with! 


Photobucket

December 2, 2011

Winter Blessings PTU Tutorial

This tutorial was written by me, any resemblance to any other tutorial is completely unintentional. PSP version used: PSP X2 Supplies: Tube- I'm using an awesome art work of Susan Justice, this tube and her other artwork can be purchased at Up Your Art. Scrap Kit of choice- I used the kit Winter Blessings by ChiChi, you can find out more about it on her blog ChiChi Designz! Font- La Jolla ESFilters- Lokas Software> Snow Eyecandy 4000> Gradient Glow
Let's get started!
Open a new canvas 600 x 600.
Frame 2, resize 80%
Open up paper 3, and position behind the frame.
Magic wand inside of the frame, and
Modify> Expand> 3 px.
Back to paper layer, and invert, delete.
Adjust> Brightness & Contrast> Brightness -40, contrast 10
Effects> Texture Effects> Blinds with these settings:
Now open Fence, resize 50% c/p
position, duplicate, and mirror.
Add your tube, resize if needed, Adjust Brightness & Contrast> Brightness -20, Contrast 20
Now add your elements:
Baulbs- 20%
Candle- 25%
Lantern- 20%
Tree1- 90%, Brightness & Contrast> -30, Contrast 15
Bird- 20%
Bunny- 25%
Snow1- 90%
Reindeer1- 60%
Swirl- 85%
Mask-80%, opacity 70
Add drop shadow to all elements.
Now for the name:
La Jolla, 85 px., BG #9091b8, FG Black.
Convert to Raster Layer.
Plug-in> Lokas Software> Snow, with these settings:
Eyecandy 4000> Gradient Glow:
Basic- 5.00, 25, 100
Color- Medium.
Then Eyecandy 4000> Gradient Glow:
Basic- 3.00, 25, 65
Color- Black Halo
Free rotate- Left, 10
Add drop shadow.
Now add your Copyright info, and
BAM!!!
All done! :) Hope you enjoy my tutorial as much as I did writing and please feel free to send me the tags you make following my tut! :) Don't forget to leave me some lurve.
Photobucket