
This tutorial was written by me, any resemblance to any other tutorial is completely unintentional. PSP version used: PSP X2
Supplies:
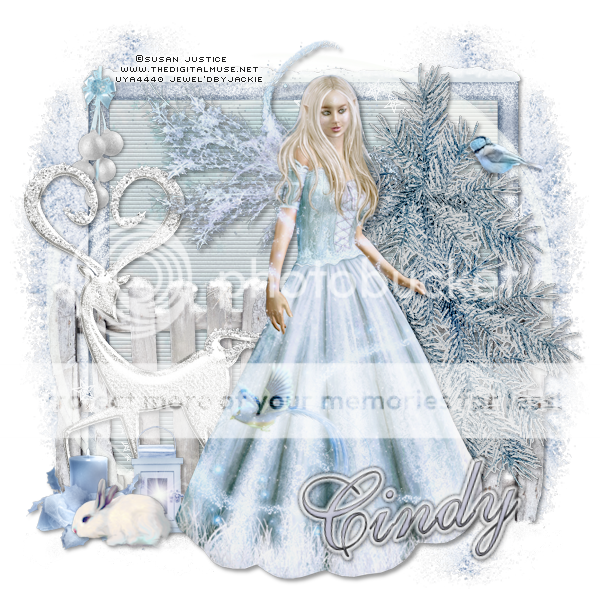
Tube- I'm using an awesome art work of Susan Justice, this tube and her other artwork can be purchased at Up Your Art.
Scrap Kit of choice- I used the kit Winter Blessings by ChiChi, you can find out more about it on her blog ChiChi Designz! Font- La Jolla ESFilters-
Lokas Software> Snow
Eyecandy 4000> Gradient Glow
Let's get started!
Open a new canvas 600 x 600.
Frame 2, resize 80%
Open up paper 3, and position behind the frame.
Magic wand inside of the frame, and
Modify> Expand> 3 px.
Back to paper layer, and invert, delete.
Adjust> Brightness & Contrast> Brightness -40, contrast 10
Effects> Texture Effects> Blinds with these settings:
Now open Fence, resize 50% c/p
position, duplicate, and mirror.
Add your tube, resize if needed, Adjust Brightness & Contrast> Brightness -20, Contrast 20
Now add your elements:
Baulbs- 20%
Candle- 25%
Lantern- 20%
Tree1- 90%, Brightness & Contrast> -30, Contrast 15
Bird- 20%
Bunny- 25%
Snow1- 90%
Reindeer1- 60%
Swirl- 85%
Mask-80%, opacity 70
Add drop shadow to all elements.
Now for the name:
La Jolla, 85 px., BG #9091b8, FG Black.
Convert to Raster Layer.
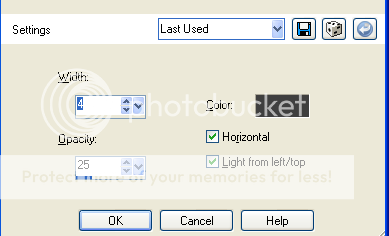
Plug-in> Lokas Software> Snow, with these settings:

Eyecandy 4000> Gradient Glow:
Basic- 5.00, 25, 100
Color- Medium.
Then Eyecandy 4000> Gradient Glow:
Basic- 3.00, 25, 65
Color- Black Halo
Free rotate- Left, 10
Add drop shadow.
Now add your Copyright info, and
BAM!!!
All done! :) Hope you enjoy my tutorial as much as I did writing and please feel free to send me the tags you make following my tut! :) Don't forget to leave me some lurve.

No comments:
Post a Comment